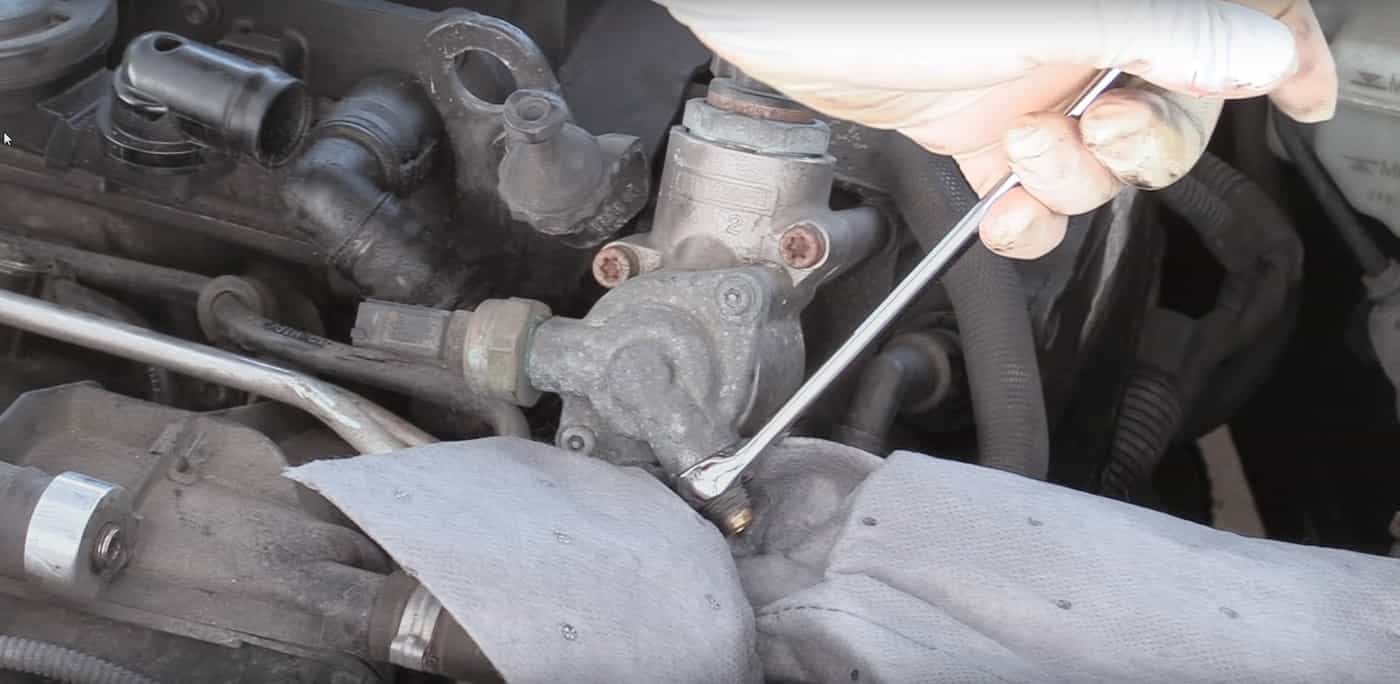
Bad Cam Follower Symptoms: 5 Warning Signs You Shouldn't Ignore
Understanding Bad Cam Follower Symptoms The engine, often referred to as the heart of a vehicle, depends on several components to run smoothly. ...
3 min read
William
:
Aug 26, 2025 5:27:45 AM
Alternator bearings are critical components that allow the alternator rotor to spin smoothly, ensuring stable power generation for your car’s electrical system.
Over time, these bearings wear out, causing noise, vibration, or even alternator failure.
Repairing alternator bearings requires careful disassembly, inspection, and reassembly.
Below is a professional step-by-step guide.
Before starting, ensure you have:
A set of wrenches and hex keys
Bearing puller and press
Ohmmeter
Soldering tools
Clean polishing cloths
Replacement alternator bearings and brushes
Note: Always make a reference mark for the “clock” position of the alternator (front-to-back orientation). This will ensure proper alignment during reassembly.
Remove the 3 thru-bolts to separate the drive end frame from the slip ring end frame.
Leave the stator in the back housing.
Detach the drive end frame from the rotor and use a hex wrench to remove the shaft nut.
Press out the cover pins and remove the cover.
Cut the leads attached to the rectifier bridge terminals and take out the stator.
Remove the baffle pins and lift out the baffle.
Take off fasteners to detach the brush holder, rectifier bridge, and regulator.
Disconnect them carefully to avoid wire damage.
Use an ohmmeter on a low scale to test the rectifier bridge.
Connect the ohmmeter leads to the heat sink and bridge terminals, then reverse the connections.
If both readings are identical, replace the rectifier bridge (a common failure point).
Wipe the brush holder with a dry, soft cloth.
If brushes are excessively worn, replace the entire brush assembly.
Rotate the rotor by hand and press a fine polishing cloth against the slip rings until clean.
Press the new bearing assembly into the frame by applying pressure on the outer surface.
Ensure it is seated firmly at the bottom of the frame.
Solder the connectors back to their original positions.
Reinstall cleaned or new brushes into the holder and pin them securely.
Apply electrical contact transfer grease under the rectifier bridge for better heat dissipation.
Tap down gently on the inner and outer race of the slip ring end flange bearing to join both end frames.
Replace and tighten the thru-bolts to secure the alternator assembly.
A: If you take it to a shop, expect to pay $150–$300 in most cases — labor is the biggest chunk. The bearing itself usually runs $20–$60 depending on your car make. DIY brings that cost down dramatically, often under $50 total if you already have basic tools. Whether it's worth doing yourself depends on how comfortable you are with disassembly — it's doable but not a beginner job.
A: Usually a high-pitched whining or grinding noise that changes with engine RPM. It's easy to confuse with a belt squeal at first. A quick way to narrow it down: if the noise pitch rises when you rev the engine, the alternator bearing is a likely suspect. Some people describe it as a "chirping" sound that gets worse over time and doesn't go away after warmup.
A: For someone who's done it before, about 1–2 hours. First-timers should budget 3–4 hours, mostly because disassembly takes longer when you're being careful not to damage the electrical components inside. Having a bearing puller makes a real difference — trying to do it without the right tools will eat up your time fast.
A: Technically yes, but not for long. A worn bearing will eventually seize, which can lock up the alternator and snap the serpentine belt. Once the belt goes, you lose power steering and the water pump — so what started as a bearing noise can turn into an overheated engine on the side of the road. If you're hearing the noise, get it sorted within a week or two at most.
A: Depends on what else is wrong. If it's just the bearing and the rectifier and rotor are in good shape, replacing the bearing makes sense and saves money. But if the alternator is older or you find the rectifier bridge is failing too (easy to test with an ohmmeter), a remanufactured alternator often costs only $80–$150 and gives you a fresh start. Most mechanics will tell you to swap the whole unit once you're already in there and something else looks questionable.
Repairing alternator bearings requires mechanical precision and attention to detail.
By carefully disassembling, inspecting, and reassembling the alternator, you can restore its performance and extend its service life.
However, if the rectifier or rotor is severely damaged, replacing the entire alternator may be more cost-effective.
Understanding Bad Cam Follower Symptoms The engine, often referred to as the heart of a vehicle, depends on several components to run smoothly. ...
Learning how to remove a bicycle sprocket is a core skill for any cyclist. This comprehensive guide will show you how to remove the old one and...
The global demand for AI accelerators — NVIDIA H100s, AMD MI300Xs, custom ASICs from Apple, Google, and Amazon — has pushed semiconductor fabs to...